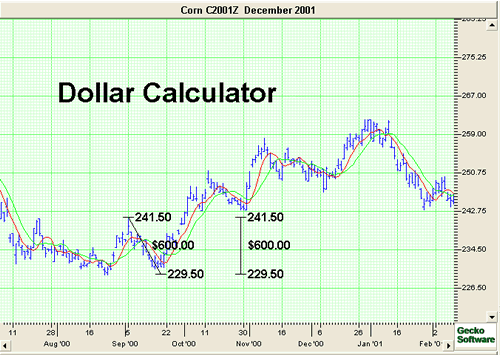
- Click on the Dollar Calculator Tool.
- Left click where you want the calculator to start
- Left click where the calculation is completed.
- The dollar amount of the chart movement will be calculated from
the beginning and end point values, and will then be displayed in the center
of the line.
Resizing the Dollar Calculator:
- Select the drawing by clicking on it.
Note: The drawing is selected when boxes
appear on the corners.
- Click on one of the boxes to drag the select point and release
the mouse button.
Moving the Dollar Calculator:
Select the drawing by clicking on it
continue holding down the mouse button, drag to the new
location and release the mouse button.
Deleting
the
Dollar Calculator:
Select the drawing by clicking on it and press the
delete key on your keyboard to remove.
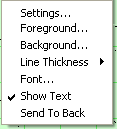
Changing the Properties of a Dollar
Calculator:
- Right-Click on the drawing to view the properties menu. (see
below)
- Properties that can be changed are:
- Settings: The settings window allows users to adjust the end points
and make their calculations
more accurate. Click on OK to make the change or Cancel to exit
this window.
- Foreground: Changes the line color of the
Dollar Calculator.
- Line Thickness: Changes the thickness of the
Dollar Calculator line.
Choose values from 1-6.
- Line Style: Changes The line style of the
Dollar Calculator line.
Choose from solid, dashed, dotted and more.
- Font: Changes the Font, Size, Style, and Color of the values.
- Show Text: Deselect/Select to view or hide the values.
- Send to back: Changes the layer of the tool. This option is
used when more than one tool is in the same area of the chart. Click
on Send to Back when you need to access a tool under the Dollar
Calculator.
|