Introduction
Just like a novel is made up of many single pages, a Chartbook contains
many individual charts. Track 'n Trade Pro gives you the ability to save
charts into one file. That file is called a Chartbook. Each Chartbook
can contain several charts, each individual chart becoming the "pages"
of your Chartbook.
Every time you open Track 'n Trade Pro a blank Chartbook named "Book1"
will open. You can either continue with the new Chartbook that is open
or you can open a Chartbook that has already been created.
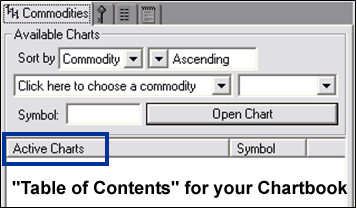
Each chart that you open and view from the Commodities tab is listed
below in the Active Charts list found on the left side of the screen.
This list is your "Table of Contents" for your Chartbook. Charts are
listed in Alphabetical order in this window. To switch between charts
simply double-click on the different charts listed.
Active Charts List in Track 'n Trade Pro:
Back To Top
Opening or Creating a New Chartbook
After opening Track 'n Trade Pro, you will see a new Chartbook has
already been started for you. It is called Book1. this new Chartbook
needs the "pages" or charts added to it. You can add pages to your
Chartbook by simply opening charts using the Commodity tab. See below.
Opening a chart in Track 'n Trade Pro:
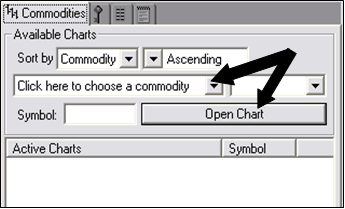
1. Choose your commodity from the dropdown menu. Then choose the
month and year from the dropdown menu to the right.
2. Click on the "Open Chart" button to open your chosen chart.
Sorting the Commodity List:
Notice that you have sorting options above the Choose a Commodity drop
down menus. You can sort commodities by Group or Exchange, plus you can
display them in an Ascending or Descending order.
Symbol Search:
If you know the symbol of the chart that you are opening, you can type
the symbol into the box after "Symbol." A complete list of Commodity
Symbols and Commodity Month Symbols can be found in the Data Download
section.
Back To Top
Adding/Removing Charts in your Chartbook
Now that you have charts in your Chartbook you might want to delete some
of the charts you have opened before you save it as a Chartbook.
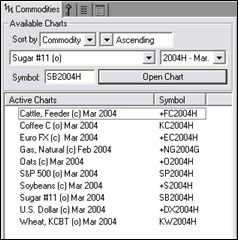 To
Remove a Chart:
Simply select the chart by clicking on it, then right-click and select
"Delete Chart".
To Add a Chart:
Simply open another chart using the instructions found in Opening a New
Chartbook in this section.
Back
To Top
Switching Between Charts in your Chartbook
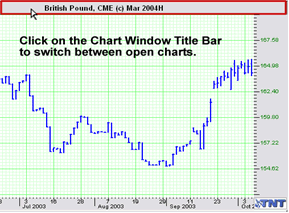
When you have several charts open in Track 'n Trade Pro, you are able to
switch back and forth between the charts listed in the Active Charts by:
1. Double-clicking the chart in the Active Charts list.
2. Pressing the Tab key on your keyboard.
3. Clicking on the Chart Window Title Bar. (see below)
Back To Top
Saving and Closing a Chartbook
When your Active Chart list is the way you want it, you can save it as a
Chartbook where it will be available to open later.
To Save a Chartbook, click on the File menu and then choose "Save Book
As." This will open the Save As window.
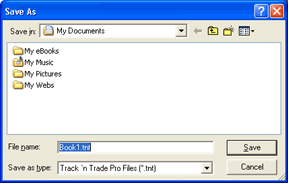
In the Save As window, you will need to note two things:
1. Look at the folder specified next to the words "Save In". The
default folder is My Documents; it is recommended that you use the
default folder unless you are familiar with the directory structure of
Windows and feel comfortable browsing to other folders. This is the
location in which your Chartbook will be saved.
2. Notice the name of your file (Default is "Book1.tnt") located
after "File Name". It is recommended that the Chartbook be renamed, so
as to not accidentally over-write this file the next time a file is
saved. Some Track 'n Trade Pro users have named Books according to
Groups, Commodities, or Exchanges depending on the charts that they are
saving in the Book. As you become familiar with Track 'n Trade Pro, you
will soon develop a system of your own.
Back To Top
Opening an Existing Chartbook
To open an existing Chartbook click on the "Open Folder" button shown
circled in the main Toolbar, or click on the File menu and select
"Open."

The following screen will appear:
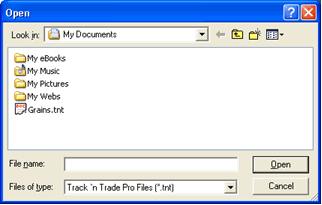
In the Open window, select your file and click on the Open button. In
the screenshot above, the Chartbook is named "Grains.tnt". Another way
to access recently saved Chartbooks is to go to the bookmarked section
at the end of the File menu.
Back To Top
Saving Charts as an Image
Many Track 'n Trade Pro users include Chartbooks and images of their
charts in emails, websites, etc. To save the current chart as it is on
your screen to an image follow these instructions:
Step One: Click on the Screen Capture button in the main Toolbar. See
below:

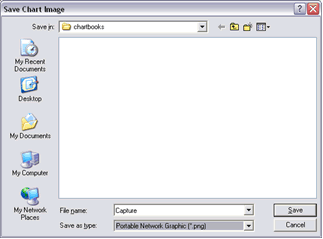
Step Two: The Save Chart Image window will open. In this window you may
specify the File Name, Location and the File Type. Once the image is
saved you are ready to email or import this graphic into your document.
The standard web file types are .gif or .jpg.
Back To Top
Printing a Chart
To print a chart in Track 'n Trade Pro, click on the File Menu and
select "Print." This will open the Windows Printer Screen for your
default printer. You can also print a Chart by clicking on the Printer
button circled below on your main Toolbar.

The printed chart will always have the Indicator Window printed at the
bottom of the chart. The size of the chart will depend on the size that
it is when you press the Print button.
For an idea of what the chart will look like, click on the
 Print Preview button to view the output before printing the chart. Also
printed on the chart are the last day's Open, High, Low, and Close.
Printing Options
Portrait:
Prints a half-page chart.
Landscape:
Prints a full-page chart.

Back To Top
Scaling a Chart
There are many Scaling tools available to use in properly scaling your
chart in Track 'n Trade Pro. Take a look at each individual tool and
learn how to use them.
Auto Scale Charts
The Auto Scale Chart feature in Track 'n Trade Pro forces the chart to
scale the price bars displayed in the chart window based on the highest
and lowest point available in this set of price bars.
If you have the Accounting & Simulator Plug-in, which includes the Play
Controls, the Auto Scale Chart feature will re-scale the chart each time
you click a Play button.
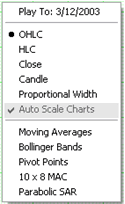
Turning on the Auto Scale Chart Feature:
Right-click on the Chart Window to see the menu shown at the left, then
select the "Auto Scale Charts" option. You will notice that a check mark
will appear when this option is selected.
You may also select this feature in the Program Options.
Sizing Controls

A. The first set of controls scales the vertical height of the price
bar.
B. The middle set of controls scales the number of price bars displayed
per inch on the chart.
C. The last set of controls scales the days along the bottom of the
chart and the points displayed on the right side of the chart
Back To Top
![]()

