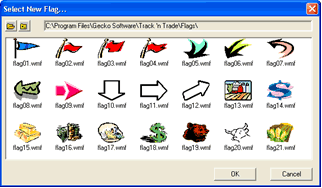
The Flag tool enables you to place a flag or a graphic on your chart. There is a basic set of flags available to choose from or you can also import custom flags.
Placing a Flag:
1. Select the Flag tool button in the Annotation Toolbar.
2. Click on the Chart Window where you would like to insert the Flag.
3. The default flag seen below the screenshot will be placed in this location.
Changing the Flag Type and Settings:
1. Right-click on the flag to display the Properties menu.
2. Select "Settings" from the menu to open the Flag Options window.
3. In Flag Settings you can select a different flag and change or import a custom flag. Importable formats: .wmf, .jpeg, and .gif.
4. After making selections, click on "OK" to make changes or "Cancel" to exit this window.
Flag Settings Window in Track 'n Trade Pro:

Moving a Flag:
1. To move a flag, click on the flag and drag to the new location.
2. Release the mouse button to place.
Deleting a Flag:
1. Click on the flag and press the Del(Delete) key on your keyboard.
2. Or, right-click the flag and select "Delete" from the menu.
Changing Size of Flag:
1. To change the size of a Flag, simply click on the flag so that it's selected.
2. Drag either of the handles to the desired the size.
Changing the Chart Position of a Flag:
1. If another drawing has been drawn in the same area as the flag, right click on it and select "Send to Back" from the properties menu to access a drawing under the flag.
Changing to the Default Flag:
1. To change the default Flag, open the Program Options window and view the Tools tab under Global Settings.
Back To Top